


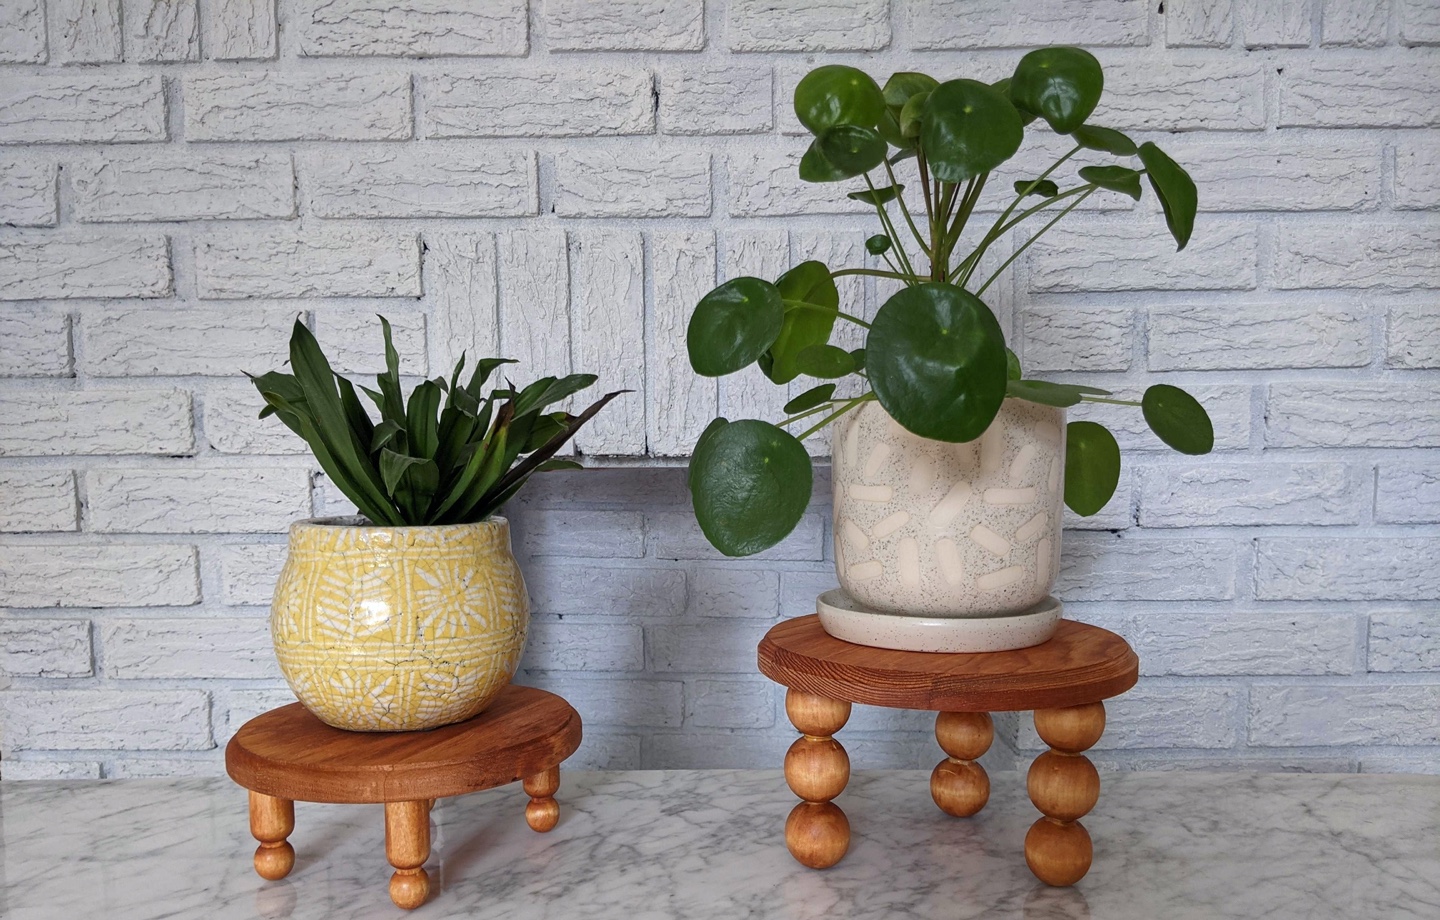

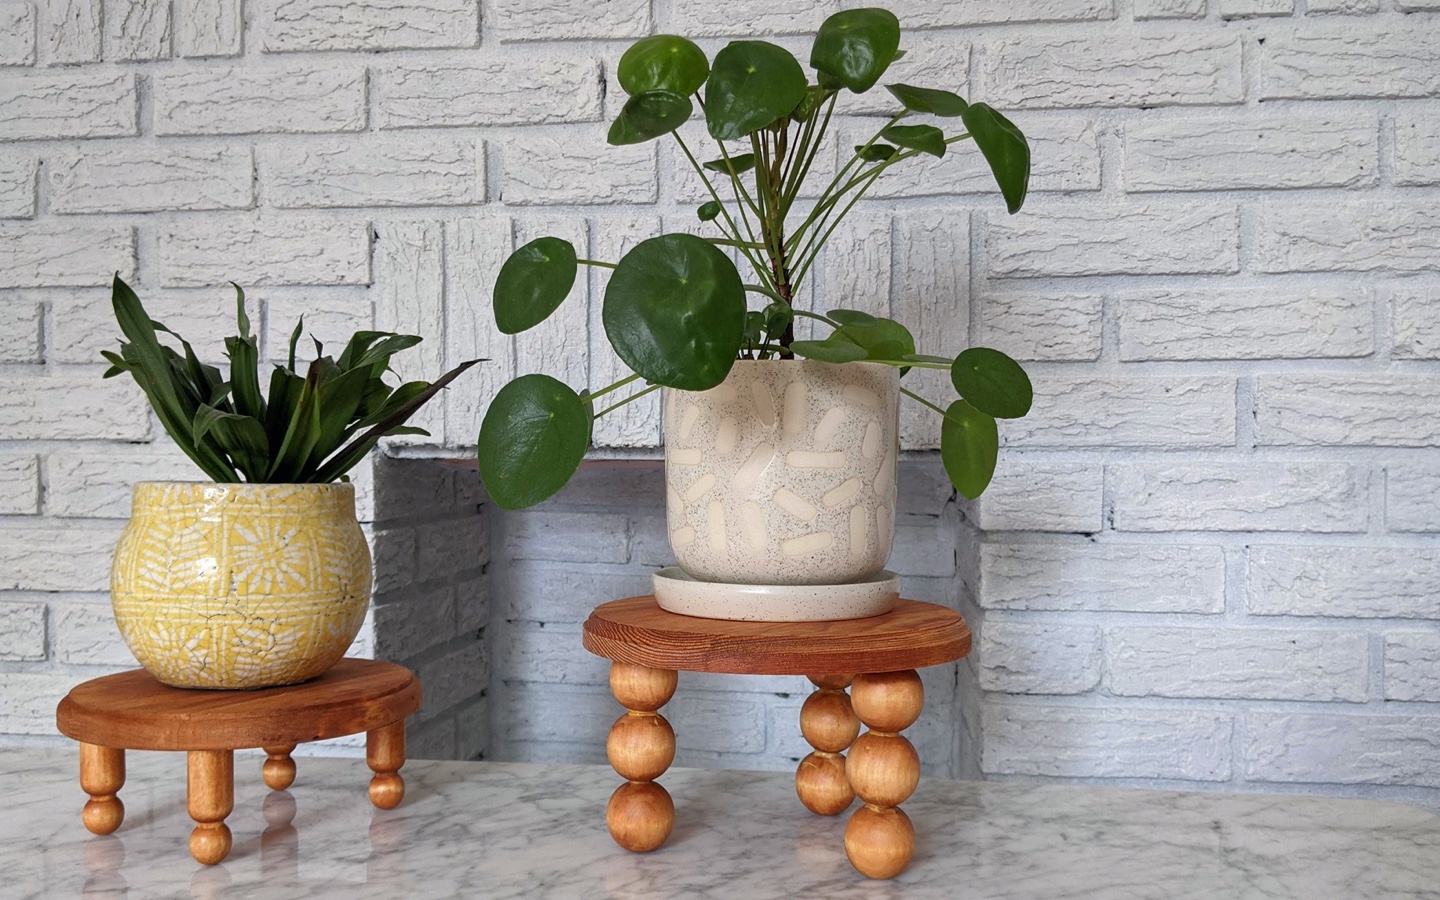
Put your favorite houseplants on display with this easy, inexpensive DIY wooden plant stand.
Alright, plant parents — this one is for you. Whether you’re the proud owner of a single snake plant or have monsteras, fiddle leaf figs, and parlor palms in every corner of your house, you know the benefits of these indoor beauties are endless.
A handful of varieties — like spider plants and Boston ferns — are known to filter the air naturally. Studies show plants can also boost productivity and lower the effects of job stress and anxiety. Taking care of plants can be therapeutic, improving your overall well-being and helping with feelings of depression. Not to mention plants are an easy, environmentally friendly way to brighten up a space.
But stands and shelves to display your green girls and guys can be expensive. So we came up with a solution. DIY wooden plant stands that are simple to make, require minimal supplies, and are much less expensive than their store-bought counterparts. Here’s our step-by-step guide.
Read more: Plants Improve Indoor Air Quality
DIY Wooden Plant Stands
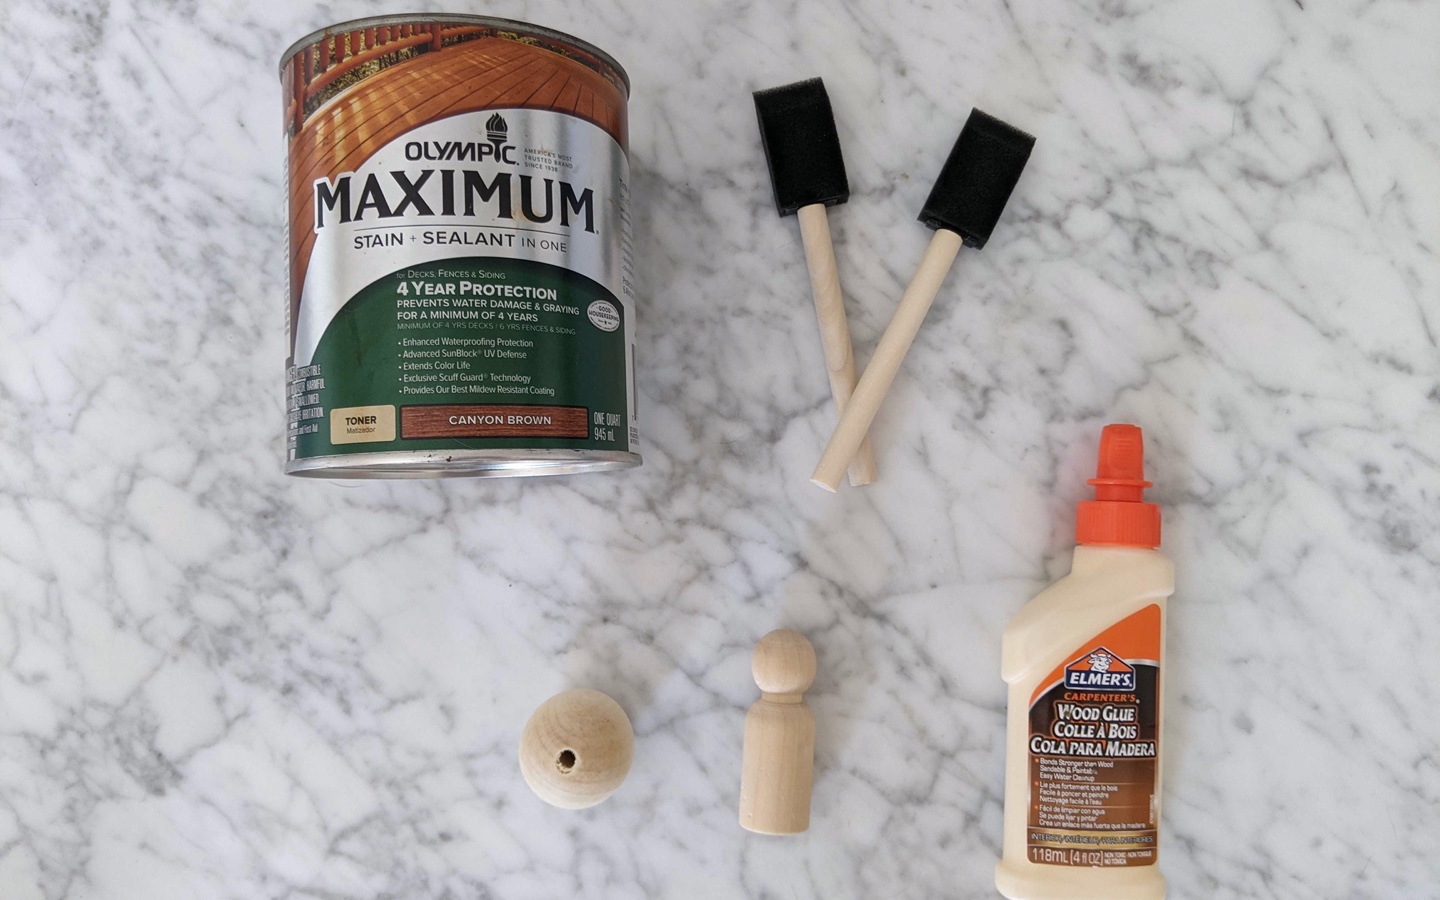
What you need:
- (2) 8-inch round wooden plaques
- (9) 2-inch wooden beads
- (4) wooden pegs
- Wood glue
- Foam paintbrushes
- Wood stain
Instructions:
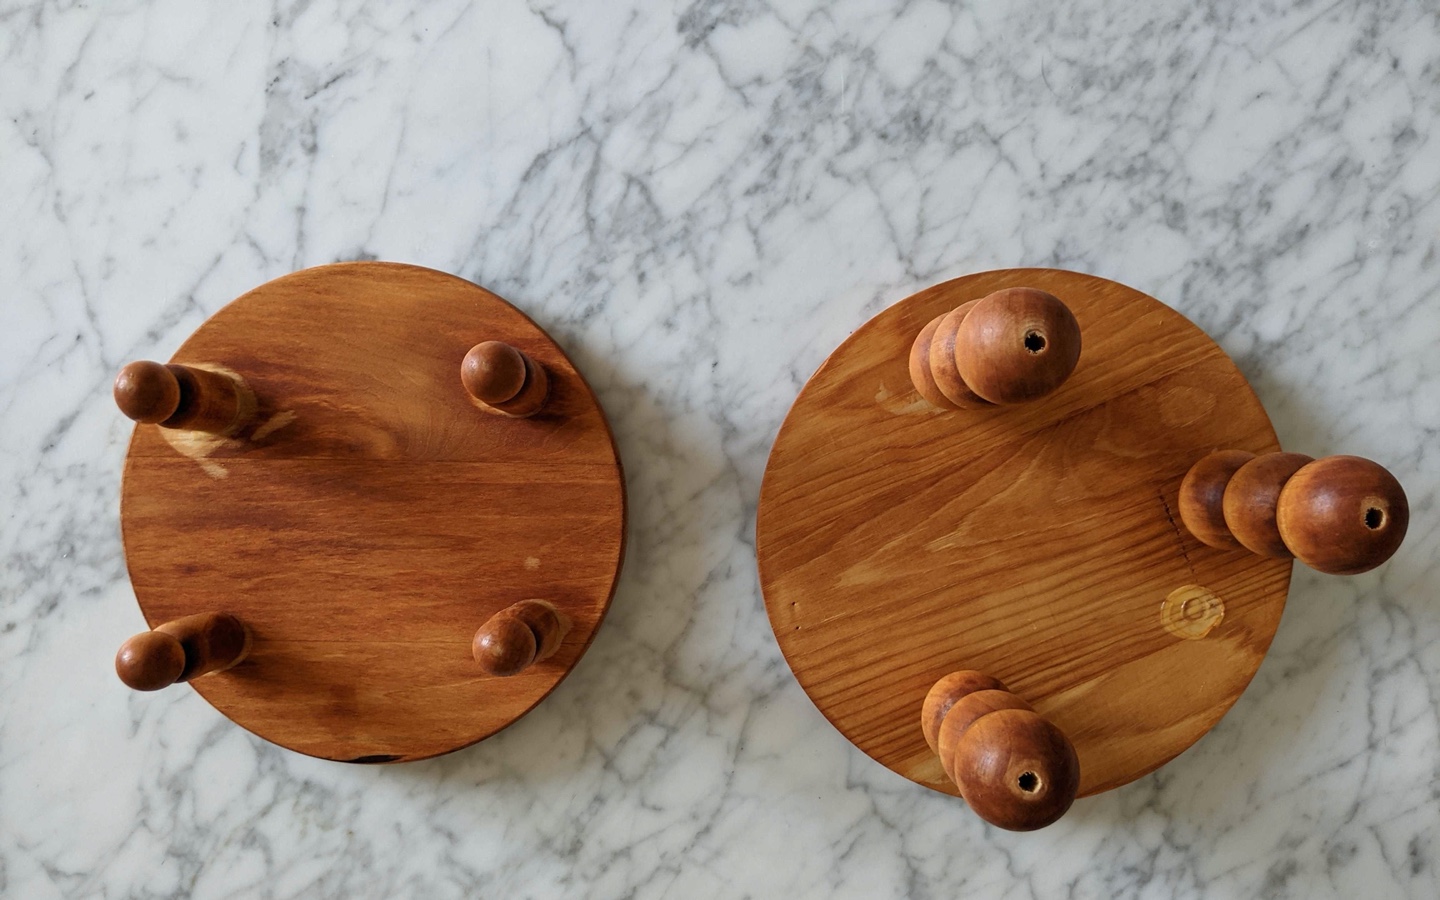
- Flip one wooden plaque over. Using the wood glue, adhere one wooden peg to the back of your plaque in each of the four corners, leaving about one inch between the side of the plaque and the peg.
- Flip over your second wood plaque. Using the wood glue, adhere one wooden bead to the back of your plaque in the top right corner about one inch from the edge.
- Glue the second bead on the top left corner, directly across from the first bead, leaving about one inch from the edge of the plaque.
- Glue the third bead diagonally below the first two, so that the three beads create a triangle shape.
- Repeat, gluing a wooden bead on top of each of the anchor beads. Let dry for one hour or more.
- Repeat this step.
- Once wood glue is dry and the pegs and beads are securely fastened to the bottom of the plaques, it’s time to stain! Lay some newspaper or a drop cloth underneath your plant stands. Using your foam paintbrush, put a light layer of wood stain over the top and sides of your plant stand. Let dry. Repeat until you’ve achieved your desired color. Let dry.
- Flip your wooden plaque over, and repeat painting the underside of your plant stand and the legs. Let dry.
- Place your favorite plant on your plant stand and put it on display!
Read more: 9 Bedroom Plants That Help You Sleep
Did you try our Plant Stand DIY? Share it with us by tagging us @avocadogreengrands on Instagram or Facebook.

Shop Pillows
The Essential Organic Pillow Collection
Gentle, breathable, non-toxic support.